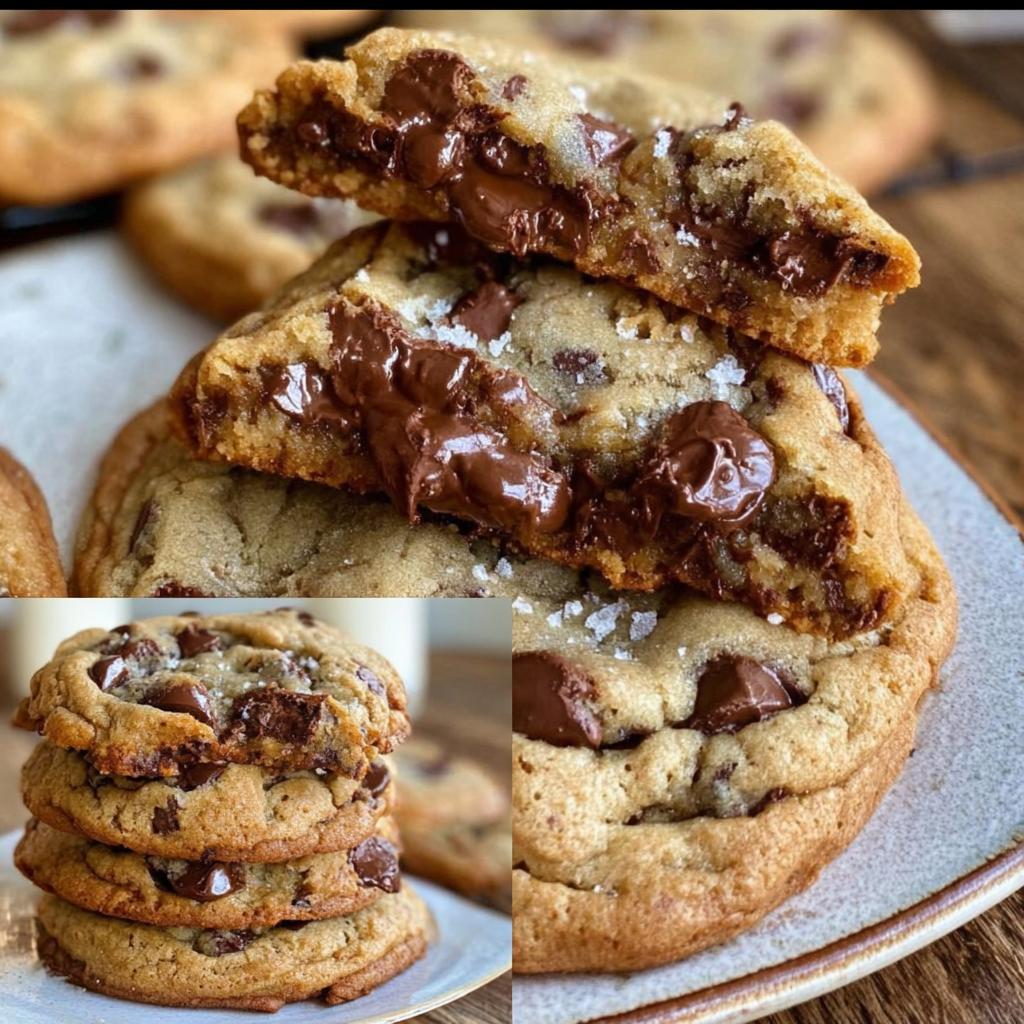
Let’s Bake Ultra Thick Bakery-Style Chocolate Chip Cookies! 🍪
Hey there! If you’re anything like me, chocolate chip cookies hold a special place in your heart. There’s something truly magical about biting into a warm, gooey cookie with crispy edges that just makes everything feel right in the world, right? Today, I can’t wait to share with you my go-to recipe for ultra thick bakery-style chocolate chip cookies that will give you those dreamy, gooey centers every time you bake them. Grab your apron, and let’s get started!
Nutritional Benefits of These Cookies
Now, let’s not kid ourselves—cookies are indeed a treat, but they also have benefits! Using unsalted butter means you can control the amount of salt your cookies take on, helping you keep the flavor balanced. Plus, the semi-sweet chocolate chips contain antioxidants found in dark chocolate! Just remember, moderation is key, so enjoy these beauties with a glass of cold milk!
Fun Variations to Try
- Nutty Goodness: If you’re a fan of nuts, feel free to add chopped walnuts or pecans for extra crunch.
- Oatmeal Twist: Substitute 1 cup of flour with quick oats for a slightly different texture and an added layer of flavor.
- Flavored Chips: Go wild! Try using white chocolate or even butterscotch chips instead of semi-sweet chocolate for a fun twist.
Your Go-To Cookie Recipe
Ingredients
- 2 1/4 cups all-purpose flour
- 1 teaspoon baking soda
- 1 teaspoon salt
- 1 cup unsalted butter, room temperature
- 3/4 cup granulated sugar
- 3/4 cup packed brown sugar
- 1 teaspoon vanilla extract
- 2 large eggs
- 2 cups semi-sweet chocolate chips
- Flaky sea salt for garnish
Instructions to Create Magic
- Preheat the Oven: Start by preheating your oven to 350°F (175°C). Line two baking sheets with parchment paper to prevent sticking and make cleanup a breeze!
- Mix Dry Ingredients: Next, grab a medium bowl and whisk together the flour, baking soda, and salt until they’re well combined. Set this bowl aside for now.
- Cream Butter and Sugars: In a large mixing bowl, use an electric mixer (or a good old-fashioned whisk if you’re feeling adventurous) to cream together the softened butter, granulated sugar, and brown sugar until it’s light and fluffy. This usually takes about 2-3 minutes.
- Incorporate Vanilla and Eggs: Now, add in the vanilla and eggs. Beat them together until everything is perfectly smooth and combined.
- Combine Wet and Dry Ingredients: Gradually add the dry ingredients to your wet mixture. Make sure to mix on low speed to avoid a flour explosion! You only want to mix until just combined; no over-mixing allowed.
- Add Chocolate Chips: Grab a spatula or wooden spoon for the next step. Gently fold in the chocolate chips, making sure every delicious bit gets evenly distributed throughout the dough.
- Chill the Dough: Here comes the secret to thickness! Cover your dough with plastic wrap and place it in the fridge for at least 30 minutes to 1 hour. This helps your cookies stay thick and chewy!
- Shape the Cookies: When you’re ready to bake, use a cookie scoop or spoon to portion the dough onto your prepared baking sheets. Make sure to leave some space in between because these babies will spread!
- Top with Flaky Sea Salt: A little hint of flaky sea salt on top before baking takes these cookies to another level. Trust me on this one!
- Bake: Pop them into the preheated oven for about 12-15 minutes. You’re aiming for lightly golden edges while keeping those centers gooey and irresistible.
- Cool: Once they’re done, let your cookies cool on the baking sheet for about 5 minutes before transferring them to a wire rack to cool completely.
- Serve and Enjoy: Grab a glass of milk, and dig in! Or store them in an airtight container for those moments when you need a sweet pick-me-up.
Practical & Valuable Tips
- Keep an eye on baking time; every oven is a little different. Remember, they’ll keep cooking a bit after being pulled from the oven!
- If you want extra thick cookies, consider using a higher butter-to-flour ratio—just a slight tweak!
- For longer storage, freeze the shaped cookie dough. You can bake them straight from the freezer; just add a couple of minutes to the baking time!
Equipment Needed
Here’s what you’ll need to get these cookies baking:
- Large mixing bowl
- Medium bowl for dry ingredients
- Electric mixer (optional, but helpful!)
- Cookie scoop or spoon
- Baking sheets lined with parchment paper
- Wire rack for cooling cookies
Frequently Asked Questions
- Can I use salted butter instead of unsalted? Yes! Just reduce the added salt slightly to compensate.
- How do I store the cookies? Keep them in an airtight container at room temperature for up to a week—or freeze them for longer freshness!
- What if I don’t have brown sugar? You can substitute it with an equal amount of granulated sugar, but your cookies may be less chewy.
- Can I make the dough ahead of time? Absolutely! Just chill the dough, and you can bake it up to a few days later.
- Why do I need to chill the dough? Chilling the dough solidifies the fats, preventing the cookies from spreading too much in the oven.
Let’s Connect!
Once you give this cookie recipe a try, I want to hear all about it! Did they make your day a little sweeter? Share your cookie adventures with me over on Pinterest! Together, we can celebrate the joy of baking and create delicious memories one cookie at a time!