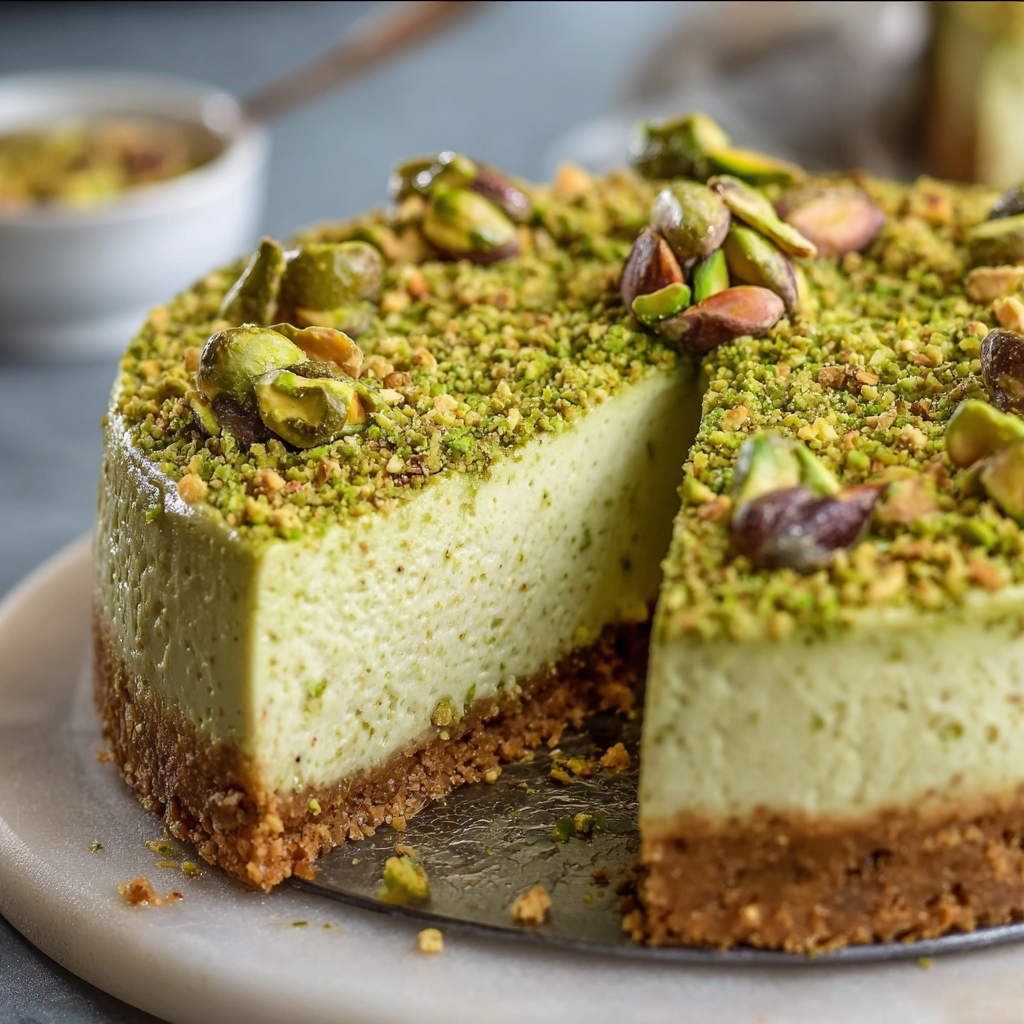
Welcome to the World of Pistachio Cheesecake!
Hey there, dessert lover! If you’re looking to impress your friends and family—or just treat yourself—this pistachio cheesecake is the perfect choice. Creamy, nutty, and oh-so-elegant, it’s a dessert that feels fancy but is surprisingly simple to make. I can already smell it baking in the oven! And trust me, once you dive into a slice, you’ll understand why this cheesecake will become a staple at your gatherings. Let’s get started!
Nutritional Benefits of Pistachios
Did you know that pistachios are not just tasty, but also packed with nutrients? They are a great source of protein, healthy fats, and vitamins! Incorporating them into this cheesecake not only adds flavor but also boosts its nutritional value. Plus, pistachios contain antioxidants that can help fight inflammation. So, you can feel a bit better indulging in this sweet treat!
Fun Variations to Try!
This recipe is wonderfully adaptable, which means you can tailor it to fit your taste and dietary needs!
- Nut-Free Option: If you’re allergic to nuts, you can swap pistachio paste for chocolate or caramel sauce for a delicious variation!
- Low-Sugar Version: Use sugar substitutes like stevia or monk fruit to lower the sugar content without losing sweetness.
- Flavor Infusions: Mix in a teaspoon of almond extract for an even nuttier flavor or a pinch of cardamom for a unique twist.
Delectable Pistachio Cheesecake Recipe
Ingredients
- For the Crust:
- 1 ½ cups graham cracker crumbs
- ½ cup unsalted butter, melted
- ¼ cup granulated sugar
- For the Cheesecake Filling:
- 16 oz (two 8 oz packages) cream cheese, softened
- 1 cup granulated sugar
- 1 teaspoon vanilla extract
- 1 cup heavy cream
- 1 cup pistachio paste (or ground pistachios)
- 2 large eggs
- 2 tablespoons all-purpose flour (optional, for added stability)
- For the Topping:
- Chopped pistachios
- 1 tablespoon finely crushed pistachios (for garnish)
Step-by-Step Instructions
- Prepare the Crust:
- First, preheat your oven to 325°F (160°C). This step is crucial for a perfectly baked crust.
- In a medium bowl, mix together graham cracker crumbs, melted butter, and sugar until it’s well combined. It should look like wet sand.
- Press this crumb mixture firmly into the bottom of a 9-inch springform pan. Bake it for about 10 minutes, then let it cool while you make the filling.
- Make the Cheesecake Filling:
- In a large bowl, using an electric mixer, beat the softened cream cheese with the sugar and vanilla until the mix is smooth and creamy.
- Add in the pistachio paste and blend it well.
- Next, pour in the heavy cream and whip until fluffy.
- Add eggs one at a time; mix well after each addition. If you’re using flour, gently mix that in as well. Just be careful not to overmix!
- Assemble the Cheesecake:
- Pour the cheesecake filling over the cooled crust. Smooth the top with a spatula for a nice, clean finish.
- Bake the Cheesecake:
- Place the springform pan in the oven and bake for about 50-60 minutes. You’ll know it’s ready when the edges are set and the center is slightly jiggly.
- Turn off the oven, crack the door open, and let the cheesecake cool inside for an hour. This helps prevent cracks from forming.
- Chill the Cheesecake:
- Remove the cheesecake from the oven and let it cool at room temperature for another hour.
- Afterward, refrigerate it for at least 4 hours, but overnight is best, allowing the flavors to develop.
- Prepare the Topping:
- Once chilled, carefully remove the cheesecake from the springform pan.
- Sprinkle chopped pistachios on top and garnish with a dash of finely crushed pistachios for a beautiful finish.
- Serve:
- Slice yourself a generous piece, and enjoy the deliciously creamy treat you’ve created!
Practical & Valuable Tips
- Be sure to bring your cream cheese to room temperature; it’ll make mixing it much easier!
- If the cheesecake cracks slightly, don’t worry! A topping will cover it up, and it’ll taste delicious regardless.
- For easy slicing, dip your knife in warm water before cutting. Wipe it off between slices for a beautiful presentation.
- If you have leftovers, store them in an airtight container in the refrigerator for up to 5 days—but I doubt they’ll last that long!
- Consider placing the cheesecake on a shallow tray filled with water while baking. This creates steam and helps achieve a smooth, creamy texture!
Equipment Needed
Before you dive in, make sure you have these tools:
- A 9-inch springform pan (for easy removal)
- A mixing bowl and electric mixer (for smooth filling)
- A spatula (to spread the cheesecake evenly)
- Measuring cups and spoons
- A knife (for slicing the cheesecake)
Frequently Asked Questions
- How long do I need to chill the cheesecake? It’s best to chill for at least 4 hours, but overnight is even better for flavor and texture!
- Instead of pistachio paste, can I use ground pistachios? Absolutely! Just be sure to blend them finely to keep the texture creamy.
- Why is my cheesecake cracking? This could be due to overmixing, baking at too high a temperature, or not cooling it properly in the oven.
- What’s the best way to store leftover cheesecake? Keep it in an airtight container in the refrigerator for up to 5 days. Just when you thought it couldn’t get better!
- Can I freeze the cheesecake? Yes! It can be frozen for up to 3 months. Just make sure it’s wrapped tightly to prevent freezer burn.
So there you have it—your own pistachio cheesecake masterpiece! I’d love to hear how yours turned out. Did you make any fun variations? Share your baking adventures with me on Pinterest, and let’s keep spreading the joy of delicious desserts!