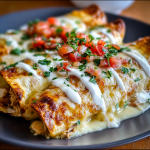
Your New Favorite Dinner: Ooey-Gooey Cheesy Garlic Chicken Wraps
Hey there! Are you ready for a dinner that is not just delicious but also super easy to whip up? I can’t wait to share this recipe for scrumptious Cheesy Garlic Chicken Wraps! Every time I make these, I can hear the “oohs” and “aahs” once everyone gets a taste. Trust me; they are the type of meal your family will ask for again and again!
Nutritional Benefits
Now let’s chat briefly about why these wraps can be a good choice for you. First, you’ve got grilled chicken packed with protein, which is essential for muscle repair and energy. Then there’s the creamy goodness of cheese, which can provide calcium—great for your bones! Plus, by using fresh garlic, you’re also getting the benefits of antioxidants. On top of that, you can absolutely make this with whole wheat tortillas to up the fiber content, so you can feel good about serving these wraps to your loved ones!
Adaptable Variations
One of my favorite things about this recipe is its flexibility! Here are some fun variations to try:
- Vegetarian Option: Swap the chicken for some sautéed mushrooms, roasted bell peppers, or your favorite veggies. It’s just as tasty!
- Spicy Kick: If you like it hot, toss in some jalapeños or red pepper flakes into the filling.
- Dairy-Free Twist: You can use dairy-free cheese and cream cheese for a vegan-friendly version that still tastes amazing!
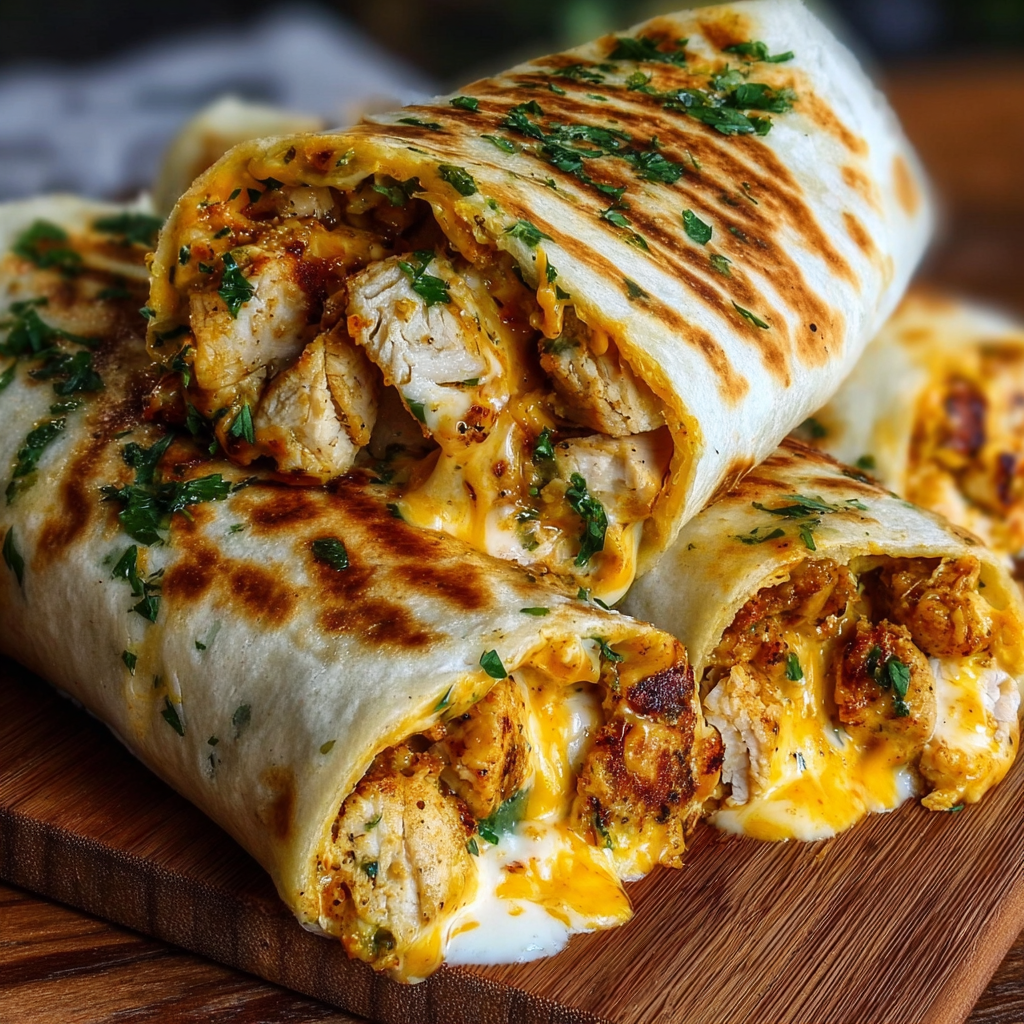
Ooey-Gooey Cheesy Garlic Chicken Wraps Recipe
Ingredients
- 2 large flour tortillas
- 1 cup grilled chicken, diced
- 1 cup shredded cheese (cheddar or a blend)
- 4 oz cream cheese, softened
- 2 tablespoons minced garlic
- 1 tablespoon olive oil
- 2 tablespoons fresh parsley, chopped (for garnish)
- Salt and pepper to taste
- Optional: Hot sauce or taco sauce for serving
Cooking Instructions
- Prepare the Filling: In a mixing bowl, combine the diced grilled chicken, shredded cheese, cream cheese, minced garlic, and a pinch of salt and pepper. Mix until all ingredients are well combined.
- Assemble the Wraps: Take one flour tortilla and spread a generous amount of the chicken and cheese filling down the center. Be careful not to overfill to avoid spillage when rolling.
- Roll the Tortilla: Fold in the sides of the tortilla and then roll it tightly from the bottom up. Ensure the filling is secured inside.
- Cook the Wraps: Heat olive oil in a skillet over medium heat. Once hot, place the rolled wrap seam-side down onto the skillet. Cook for about 3-4 minutes until golden brown and crispy.
- Flip the Wrap: Carefully flip the wrap and cook the other side for another 3-4 minutes or until both sides are evenly browned and the cheese is melted inside.
- Garnish and Serve: Once cooked, remove the wraps from the skillet and let them rest for a minute. Slice them in half diagonally for better presentation, garnish with chopped parsley, and serve with hot sauce or taco sauce if desired.
- Enjoy: Serve immediately while hot and cheesy!
Practical & Valuable Tips
- If you’re making this for a crowd, just multiply the filling ingredients and have more tortillas ready.
- Store any leftovers in an airtight container in the fridge for up to 2 days. Just pop them back in a skillet to reheat!
- Wanna keep things healthier? You can use Greek yogurt instead of cream cheese for a lighter option!
Equipment Needed
To make these delightful wraps, you’ll need a few basic kitchen tools:
- A large mixing bowl for stirring up that tasty filling
- A skillet to cook the wraps
- A spatula to flip those wraps without making a mess
- A sharp knife for slicing after they’re cooked
Frequently Asked Questions
- Can I use leftover chicken for this recipe? Absolutely! Leftover chicken works perfectly as it’s already cooked and saves you time!
- What if I don’t have cream cheese? No worries! You could use sour cream, Greek yogurt, or even ricotta cheese for a twist.
- How can I store any leftovers? Place them in an airtight container in the fridge for about 2 days. Just reheat in a skillet to crisp them back up!
- Can I make these wraps ahead of time? Yep, just assemble and cover them in the fridge. Cook them before serving to enjoy the cheesy goodness!
- What sides pair well with these wraps? You can serve them with a fresh salad, some guacamole, or crispy nachos on the side!
Have you tried making these Cheesy Garlic Chicken Wraps at home? I’d love to hear how they turned out for you! Snap a picture of your creation and share it on Pinterest! Let’s spread the cheesy love together!