Welcome to a Sweet Indulgence!
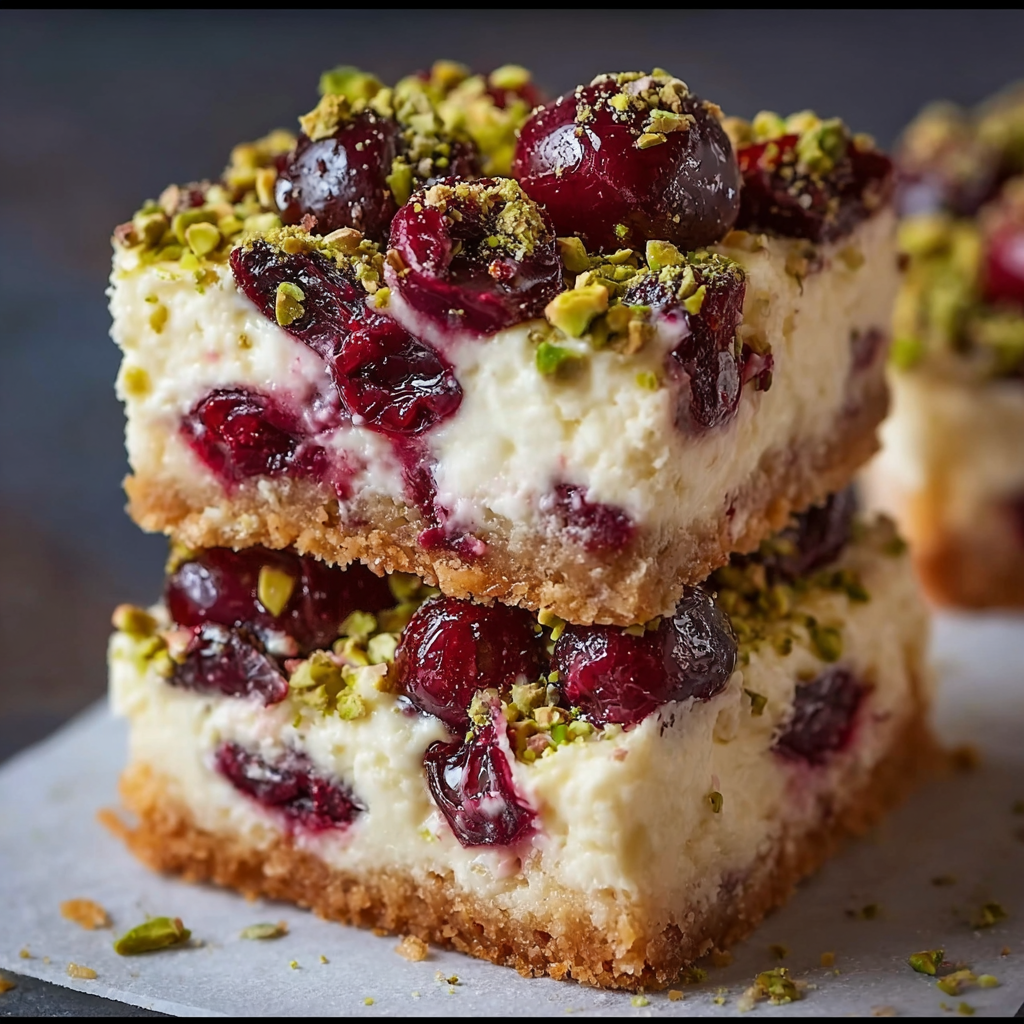
Hello dessert lovers! If you’re in the mood for something creamy, nutty, and with a touch of tartness, I’ve got the perfect recipe for you: Cherry Pistachio Cheesecake Bars. I just can’t get enough of these! It’s like a little piece of heaven in every bite. Plus, they’re incredibly easy to whip up, making them perfect for gatherings, or even just for a cozy night at home. Ready to dive in and give them a try? Let’s get started!
The Joy of Homemade Cheesecake Bars
You might be wondering why go through the effort of making cheesecake bars when you can easily find them at the store. Well, let me tell you a little secret: making them at home means you can create a flavor profile that perfectly suits your taste. Plus, the ingredients are fresher without any preservatives or artificial flavors.
Nutritional Benefits
Now, let’s talk about what makes these cheesecake bars a bit healthier than your standard dessert. The cherries are not just delicious; they are packed with antioxidants that can offer various health benefits, including reducing inflammation and improving sleep. And let’s not forget about pistachios! These little green gems are loaded with healthy fats, fiber, and protein. They not only add a delightful crunch but also bring essential nutrients that your body will appreciate.
Fun Variations You Can Try!
- Flavor Forward: Want tropical vibes? Swap cherries for crushed pineapple or fresh mango!
- Gluten-Free Option: Use gluten-free graham cracker crumbs or hazelnut flour for the crust.
- Dairy-Free Alternative: If you’re looking for a non-dairy option, try using vegan cream cheese and a dairy-free butter alternative.
- Extra Crunch: Add some almond slivers or even crushed oreos on top for a fun crunch and delicious twist!
Delicious Cherry Pistachio Cheesecake Bars Recipe
Ingredients
- 1 cup graham cracker crumbs
- 1/4 cup granulated sugar
- 1/3 cup unsalted butter, melted
- 16 oz cream cheese, softened
- 1 cup granulated sugar (for cheesecake)
- 1 tsp vanilla extract
- 2 large eggs
- 2 cups fresh or frozen cherries, pitted
- 1/2 cup shelled pistachios, chopped
- 1 tbsp lemon juice
- 1/4 tsp salt
Instructions
- Preheat your oven to 325°F (163°C) and line an 8×8-inch baking pan with parchment paper, allowing some overhang for easy removal later.
- In a mixing bowl, combine the graham cracker crumbs, 1/4 cup granulated sugar, and melted butter. Mix until well combined—think wet sand consistency!
- Press this mixture firmly into the bottom of your baking pan to create a nice even crust. Pop it in the oven for about 10 minutes to set, then let it cool a bit.
- In another bowl, beat the softened cream cheese using an electric mixer until it’s super smooth and creamy—around 2-3 minutes should do it!
- Add in 1 cup of granulated sugar gradually, mixing well until everything is nicely blended.
- Next, toss in the vanilla extract, lemon juice, and salt, mixing gently until combined.
- Add the eggs one at a time, beating on low speed just until combined. This step is crucial—too much mixing can create air bubbles, which we don’t want!
- Gently fold in the pitted cherries; I love seeing these beautiful bursts of red throughout the mixture!
- Pour that luscious cherry cream cheese mixture over your cooled crust and smooth the top with a spatula.
- Now sprinkle the chopped pistachios over the top—it adds a beautiful color contrast and a brilliant crunch!
- Bake in the oven for 40-45 minutes, or until the edges look firm, and the center has just a slight jiggle—it will firm up as it cools.
- Once baked, turn off the oven and let these bars cool inside with the door ajar for about an hour. It’s all about that gentle cooling!
- Finally, let the bars cool completely at room temperature and then refrigerate for at least 4 hours or ideally overnight for the best texture.
- When you’re ready to serve, lift them out using the parchment paper, cut into squares, and enjoy the creamy, nutty, tart-sweet goodness!
Practical Tips
- Want super clean slices? Use a hot knife to cut the bars—just dip it in hot water, dry it off, and slice through!
- If you’re not serving immediately, keep the bars in the fridge to maintain that creamy texture.
- These bars can last up to a week in the fridge, but let’s be honest—good luck with that; they likely won’t last that long!
Equipment Needed
Before you get started, make sure you have these tools handy:
- An 8×8-inch baking pan
- A mixing bowl
- An electric mixer (or a good old-fashioned whisk if you’re feeling strong!)
- A rubber spatula
- A whisk
- A sharp knife for cutting into perfect squares
Frequently Asked Questions
- Can I use frozen cherries? Yes! Just make sure they are pitted and thawed before adding to the mix.
- Is it necessary to refrigerate overnight? If you can wait, yes! It helps the bars set up perfectly.
- Can I use another nut instead of pistachios? Absolutely! Almonds or walnuts can give different flavors and crunch.
- How do I know when they are done? Edges should be set, and the center should have a slight jiggle—it continues to set as they cool!
- Can I double the recipe? Of course! Just use a larger pan for more deliciousness!
Join the Fun!
I hope you’re excited to make these Cherry Pistachio Cheesecake Bars! They quickly become a favorite around any kitchen. I’d absolutely love to see your version of these bars! Snap a picture and share it with me on Pinterest or any of your favorite social media platforms. Let’s spread the sweet joy together!